Configure Webhook Reception in ServiceNow
NOTE: This documentation was written based on ServiceNow documentation at the time of release. Check ServiceNow for the most current documentation.
ServiceNow provides a mechanism to expose APIs and create public URLs to interact with its platform. ServiceNow allows you to create custom RESTful APIs using server-side scripts, known as Scripted REST APIs. Use these APIs to expose specific functionality from your ServiceNow instance and interact with it using standard HTTP methods. Control access through authentication methods like basic authentication or API keys.
NOTE: For the 11.0 on-premises release: In the example code snippets in following sections, the Tenant ID variable does not apply to on-premises. If Tenant ID is included for an on-premises environment, it will result in an empty GUID.
Create a Scripted REST API in ServiceNow
NOTE: You must have the web service administrator role to work with scripted REST APIs.
-
Log into your ServiceNow account.
-
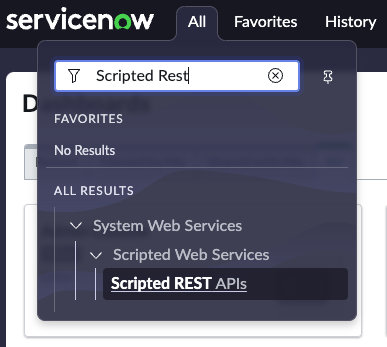
In the search field, type Scripted REST APIs.
-
In System Web Services > Scripted Web Services, select Scripted REST APIs.
-

-
Click New to create a new API service.
-
Enter a name and API ID. For this example, we use systrack connection.

-
Click Submit.
-
In the Name search bar, enter the API you just created, systrack connection.
-

-
Click the link that pops up.
-
Scroll to Resources and click New.
-
In Name, enter event.
-
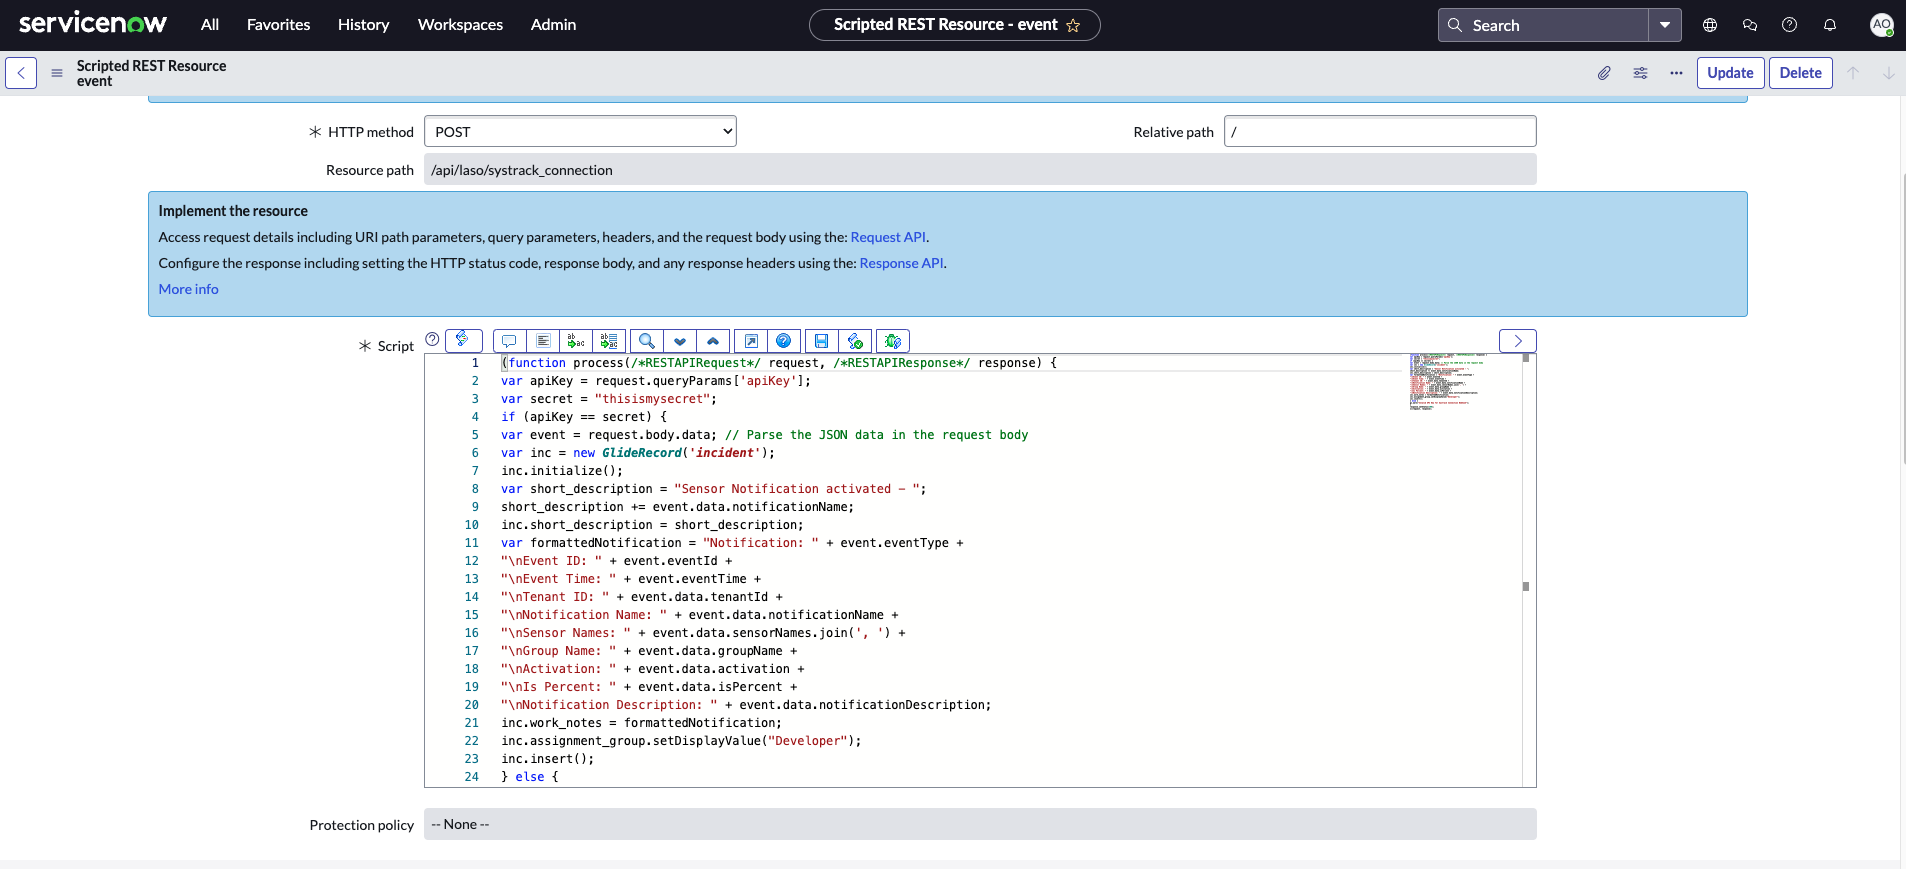
In HTTP method, select POST.
-
Scroll to the Script section and paste your code snippet.
-

NOTE: Use this as a starting point for your script and modify it to represent how you want SysTrack information displayed as your ServiceNow incident.
-
Update three variables in the script:
-
group: The group to assign the incident to (required).
-
email: Specific person to assign the incident to (optional).
-
secret: A random string that acts as a unique identifier (required). Save this value to use later when setting up the webhook.
-
IMPORTANT: The example script that follows gets the apiKey from headers instead of from the URL.
The example script below expects a secret of "1VX4YABggw".
var secret = "1VX4YABggw";
You can change the secret variable to whatever secret value you would like.
(function process( /*RESTAPIRequest*/ request, /*RESTAPIResponse*/ response) {
    gs.warn("Scripted webhook /api/laso/systrack called.");

    var apiKey = request.headers.apikey;
    var secret = "1VX4YABggw";


    if (apiKey == secret) {
            var event = request.body.data; // Parse the JSON data in the request body
            var inc = new GlideRecord('incident');
            inc.initialize();
            var short_description = "Sensor Notification activated - ";
            short_description += event.data.notificationName;
            inc.short_description = short_description;

            var desc = "The sensor notification " + event.data.notificationName + " was triggered.";
            desc += " The notificaton was triggered because at least " + event.data.activationString;
            desc += " had the following sensor(s) active: " + event.data.sensorString + ".\n\n";
            desc += "To view more details for this activation, please navigate to the following SysTrack URL: ";
            desc += event.preventURL;
            inc.description = desc;

            var formattedNotification = "Notification: " + event.eventType +
                "\nEvent ID: " + event.eventId +
                "\nEvent Time: " + event.eventTime +
                "\nTenant ID: " + event.data.tenantId +
                "\nNotification Name: " + event.data.notificationName +
                "\nSensor Names: " + event.data.sensorNames.join(', ') +
                "\nGroup Name: " + event.data.groupName +
                "\nActivation: " + event.data.activation +
                "\nIs Percent: " + event.data.isPercent +
                "\nNotification Description: " + event.data.notificationDescription;
                inc.work_notes = formattedNotification;
                inc.assignment_group.setDisplayValue("Developer");
                inc.insert();
            } else {
                gs.warn("Invalid API Key for Systrack Connection Webhook");
            }

            response.setStatus(200);
})(request, response);
NOTE: The script provided is for creating an incident in ServiceNow, but you can adjust it to create another ticket type. See ServiceNow documentation for more information.
-
In Security, deselect Requires authentication. We are using the secret variable to protect access to the API.
-
Click Submit.
-
In Configure, make a header with the name of apiKey and a value of your secret.
-
See Sensor Notification Recipients for more information about configuring the webhook as a sensor notification recipient.
Webhook Body Template for ServiceNow
Copy and paste this content into the Body section of the Add New Recipient dialog box. Edit as needed.
{
    "eventId": "@{notificationActivationId}",
    "eventTime": "@{activationTime}",
    "eventType": "SensorNotification.Activated",
    "data": {
        "tenantId": "@{tenantId}",
        "notificationName": "@{notificationName}",
        "sensorNames": [@{sensorNames}],
        "groupName": "@{groupName}",
        "activation": @{activationThresholdValue},
        "isPercent": @{activationThresholdIsPercent},
        "notificationDescription": "@{notificationDescription}",
        "sensorString": "@{sensorNamesUnquoted}",
        "activationString": "@{activationThresholdText}"
    },
    "systemsAffectedURL": "@{systemsCurrentlyAffectedURL}",
    "preventURL": "@{notificationActivationDetailsURL}"
}
On This Page